Increase Your Optin Tracking with Popup On Click
Also known as a “2-Step Optin”, setting your optin form to be “Popup On Click” instantly increases your conversion tracking accuracy. How is this possible?
Consider everyone who visits your website or blog post. Many of these people (hopefully) are return visitors, some of whom have already filled out your optin form and all of whom have already seen your optin form. If you’ve setup a standard non-click optin every visitor will see the form whether or not they are interested in doing so, your impressions will be inflated, dragging down your conversion rate. Wouldn’t it be better to know how many new, interested visitors viewed your optin form and see how that compares to your conversion rate?
Look at your conversion rate this way: a low rate should indicate to you that something is not interesting or invaluable to your audience. Whether it’s more leads or sales, something needs to change to get the results you’re looking for. What if you wrongly change a really well-converting optin because your rate is wrong??
That’s what a Popup On Click optin form fixes for you!
This is done by inviting your visitors to click on a button or image, which then presents them with your optin form in a popup window. Now interested visitors will be measured and repeat visitors will be excluded, giving you a more accurate picture of how your form is performing.
Implementing this simple change in my own blog instantly improved my conversion rate from an awful 0.5% to a much more respectable 5%. I provided the exact same fremium offer; the only change was moving to a popup on click optin form.
Bloom Plugin
There are many optin plugins available for you to choose from. A couple of the best ones I’ve found are Optin Monster and Bloom. Since I’m already using (and loving) Elegant Themes for the Divi backend of my blog, I chose to go with their plugin: Bloom.
I immediately loved the look, ease of use, and customizability of Bloom!
The only piece missing for me (and the thousands of other users) was the ability to create a popup on click optin. It’s hopeful that this will be added in future releases, but in the meantime we’ve discovered a super simple trick that allowing us to create the functionality we’re looking for.
Here it is for you, in 7 easy steps!
Popup On Click Optin Using the Bloom Plugin
Let’s get into the specifics of how to create a popup on click optin using the Bloom plugin!
Please be aware that I’ve included all steps required to setup a Bloom optin form, so if you’re already familiar with using Bloom, you’ll want to skip down to Step 6 where we begin customizing specifically for a popup on click form.
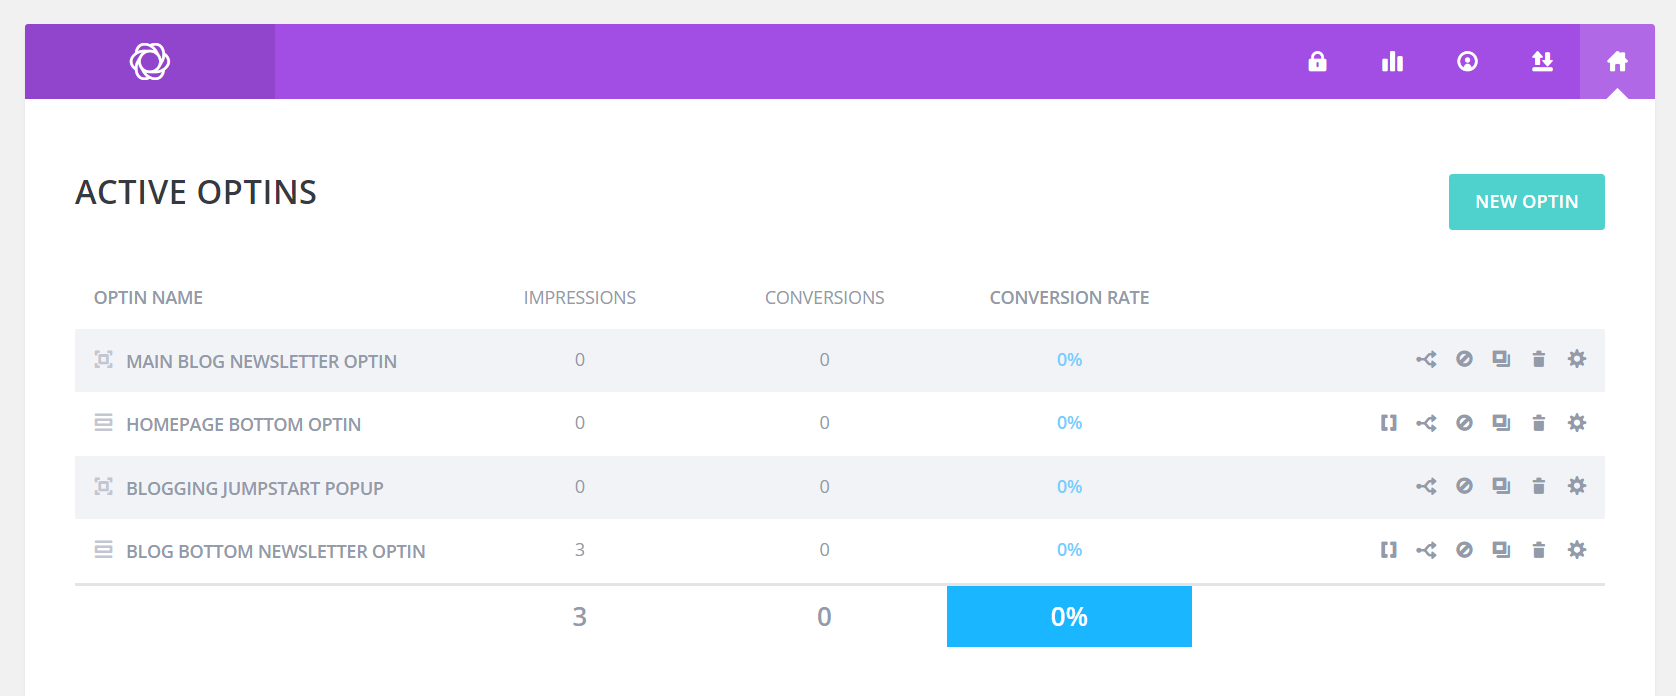
From your WordPress dashboard click on the Bloom menu item to open the plugin settings. You’ll be met with a list of your existing active and inactive Bloom optin forms.
Step 1
Click the New Optin button to get started building your new popup on click optin form.
Step 2
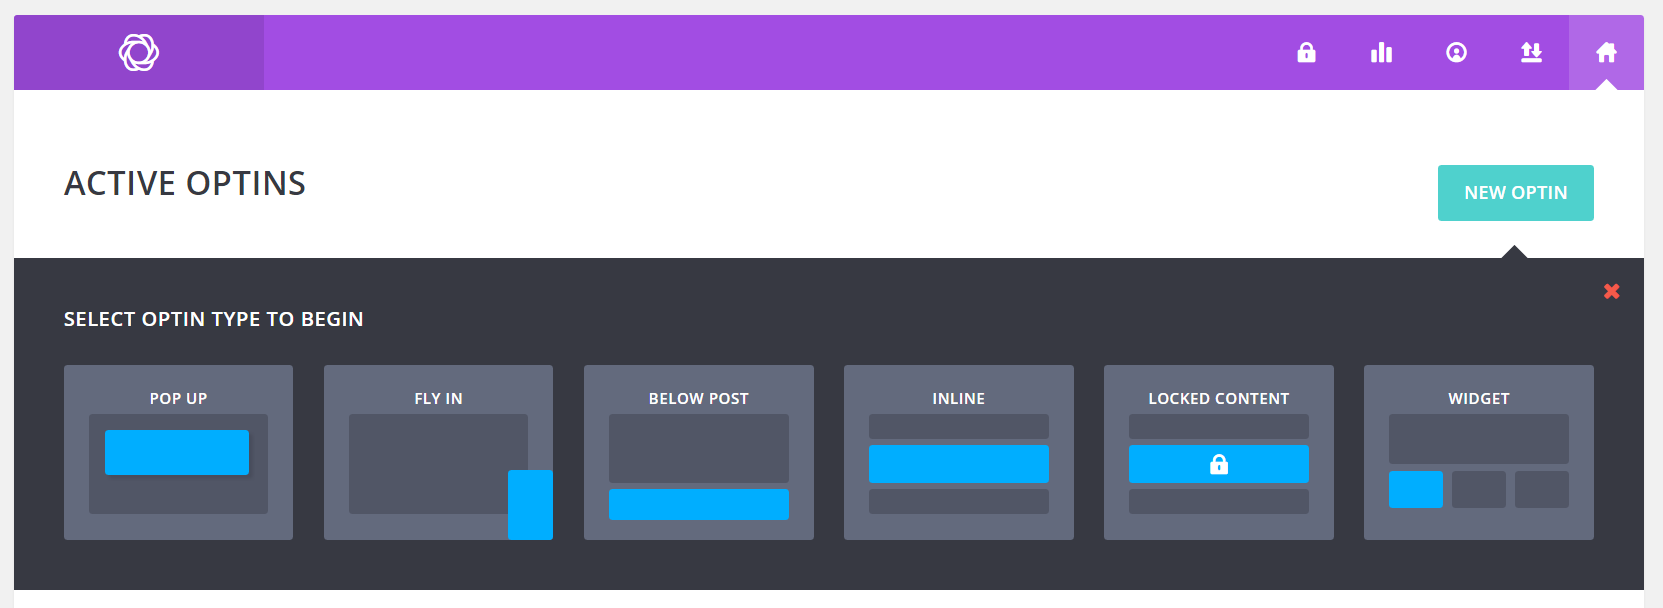
Click the “POP UP” option to select the popup type of optin form.
Step 3
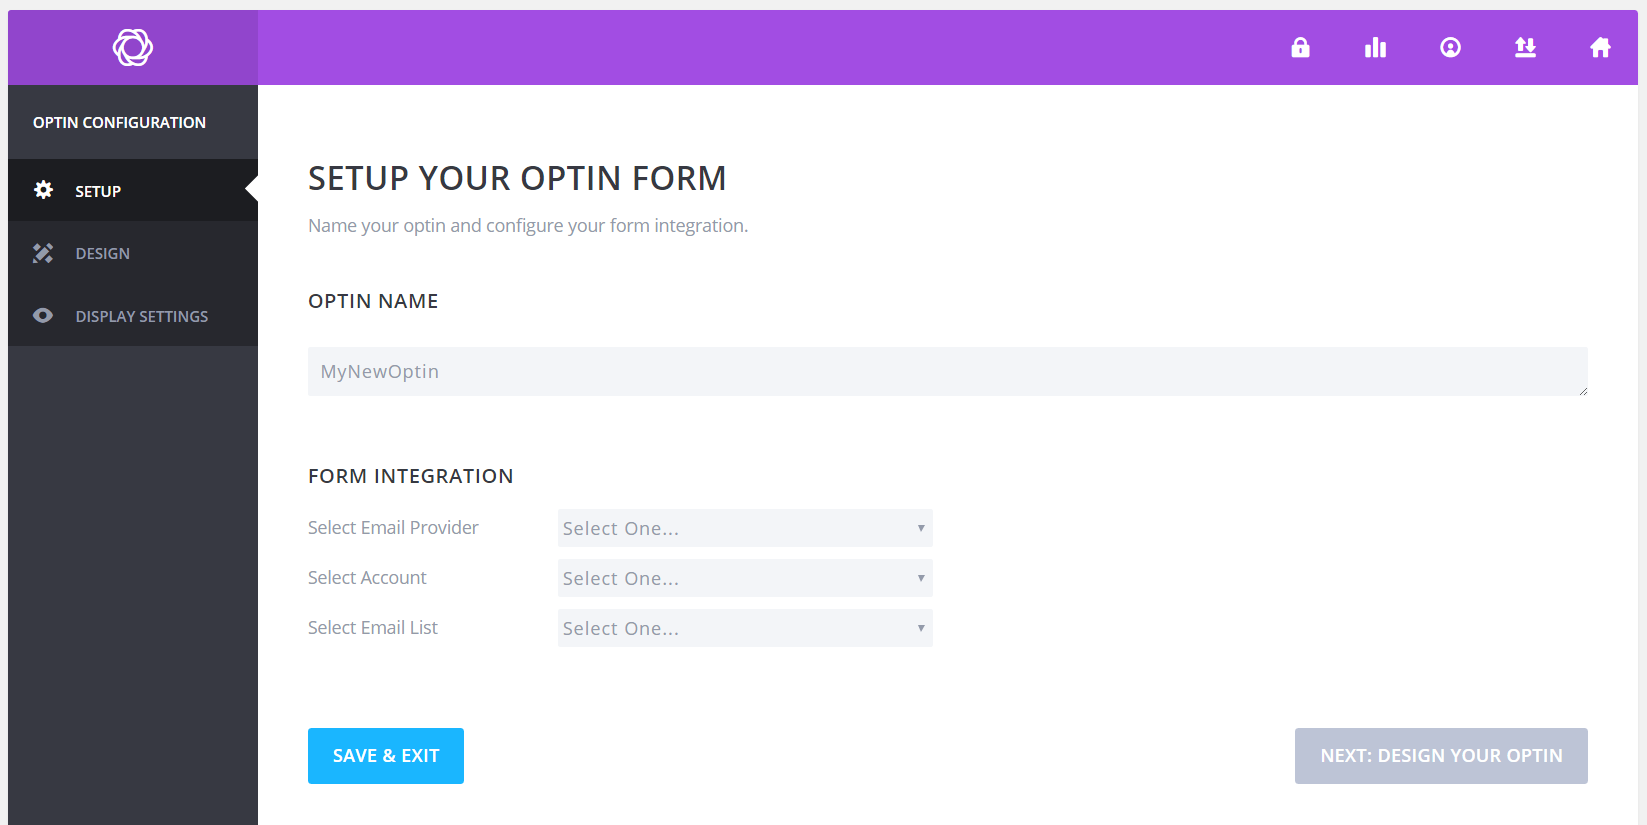
Give your new popup on click optin a Name, and integrate it with your desired autoresponder list using the dropdown boxes. If you haven’t yet set up your autoresponder, you’ll need to complete that before you can continue. I personally use AWeber, and highly recommend it to everyone I work with.
Click the “Next: Design Your Optin” button
Step 4
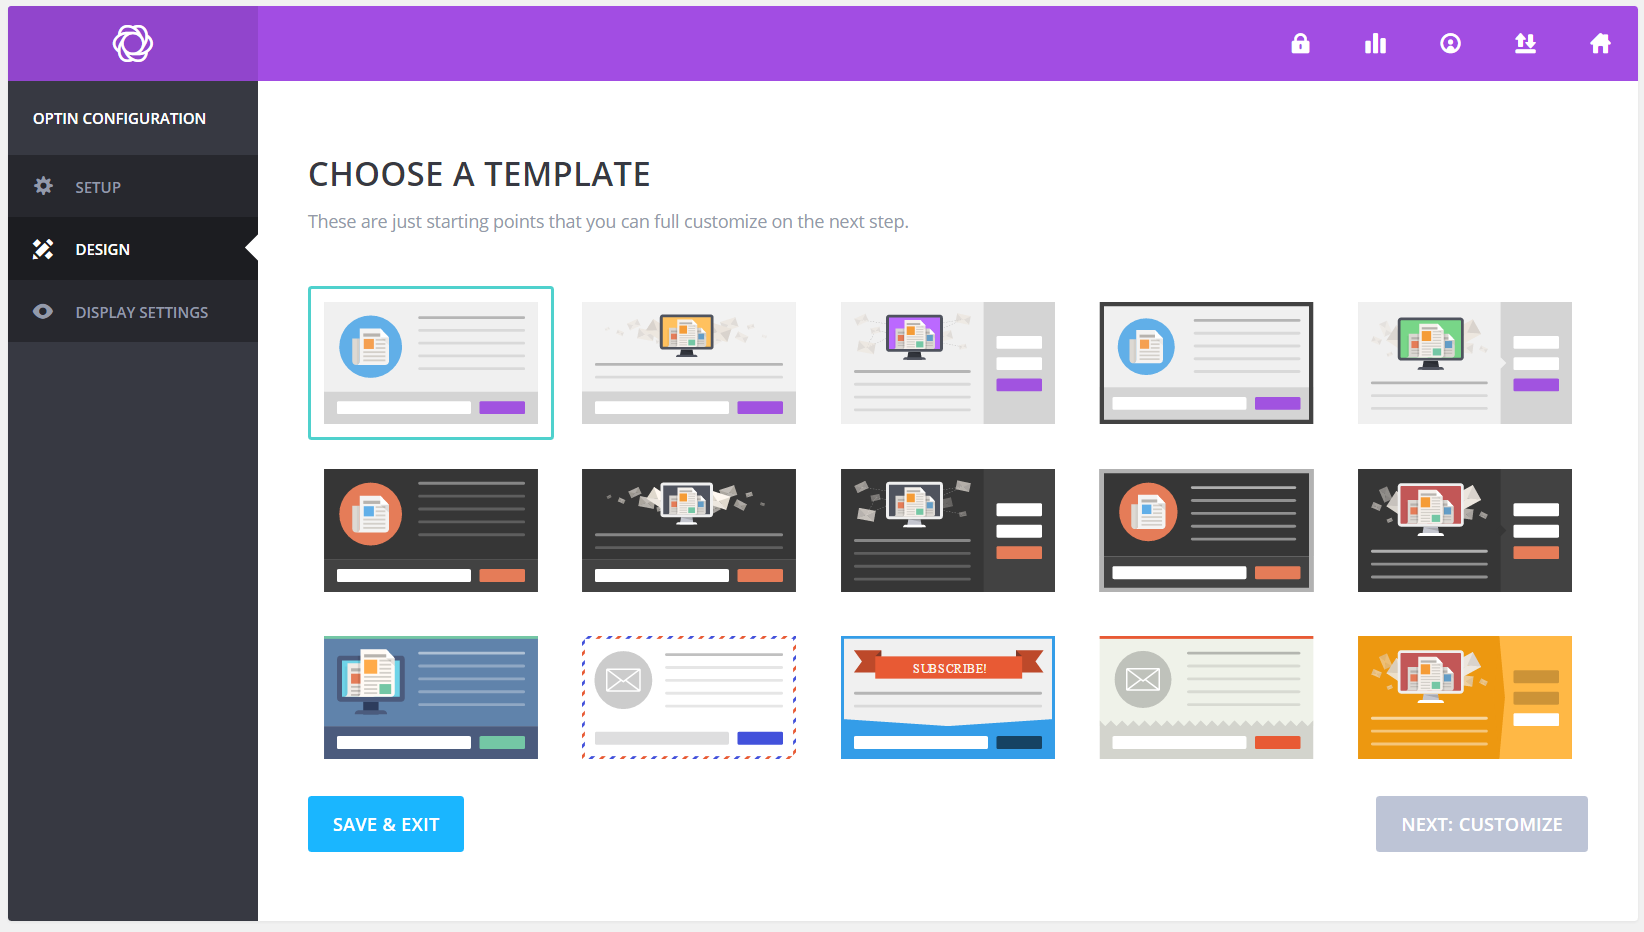
Select one of the Templates to use as the starting point for your new popup on click optin form. Don’t spend a lot of time here as just about everything you see is customizable.
These templates are more a guide of what’s possible then they are a locked-in template. Click on the one you choose, then scroll to the bottom of the page and click the “Next: Customize” button.
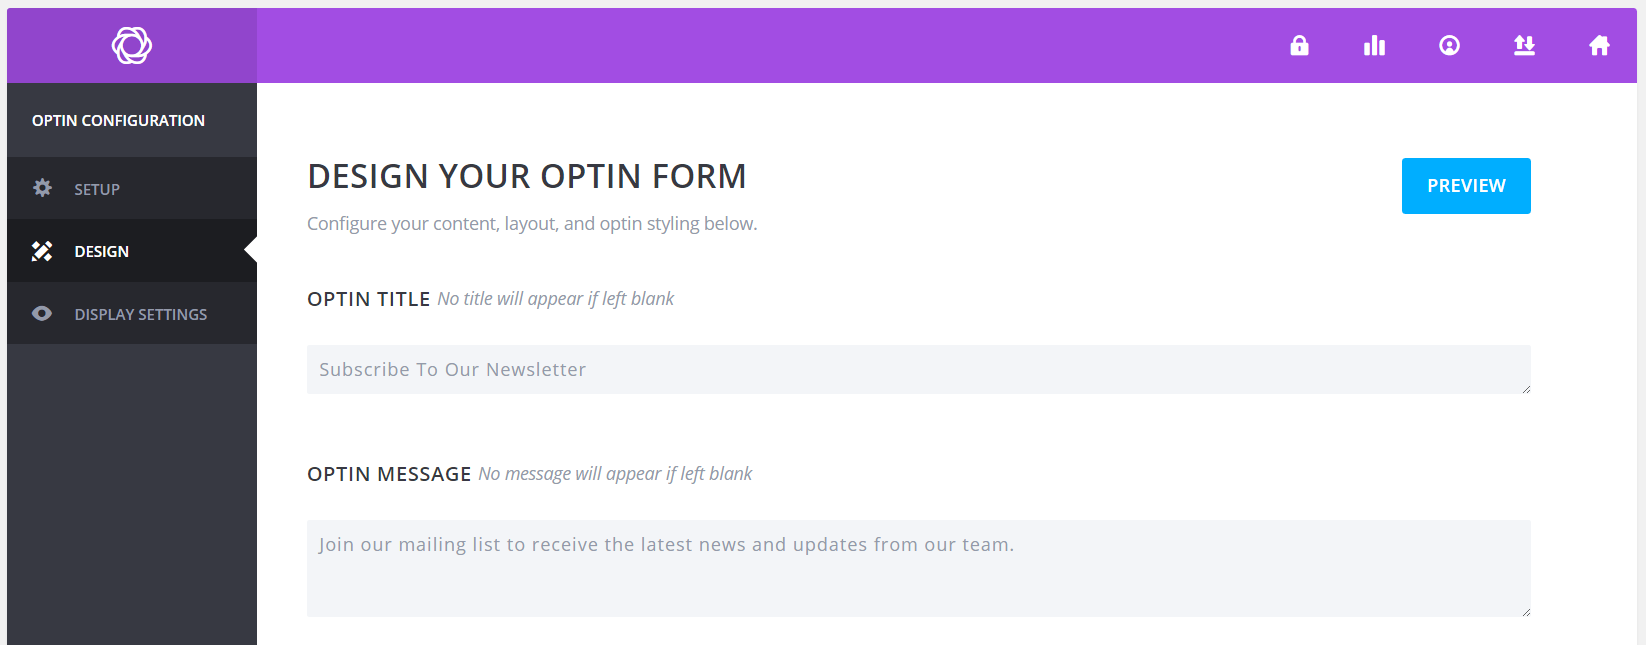
Step 5
This is where the fun begins. Use the settings on this page to customize the look and feel of your popup on click optin form. Use the “Preview” button at the top right at any time to check out your creation.
When your done, click the “Next: Display Settings” button
Step 6
This is where we move from setting up any other optin form to creating a popup on-click optin form.
Click the checkbox for “Trigger On Click” and enter a “CSS Selector (string)” such as “a.trigger_popup”. Make sure both the “post” and “page” options are selected under “Display On”, then scroll to the bottom of the page and click the “Save and Exit” button.
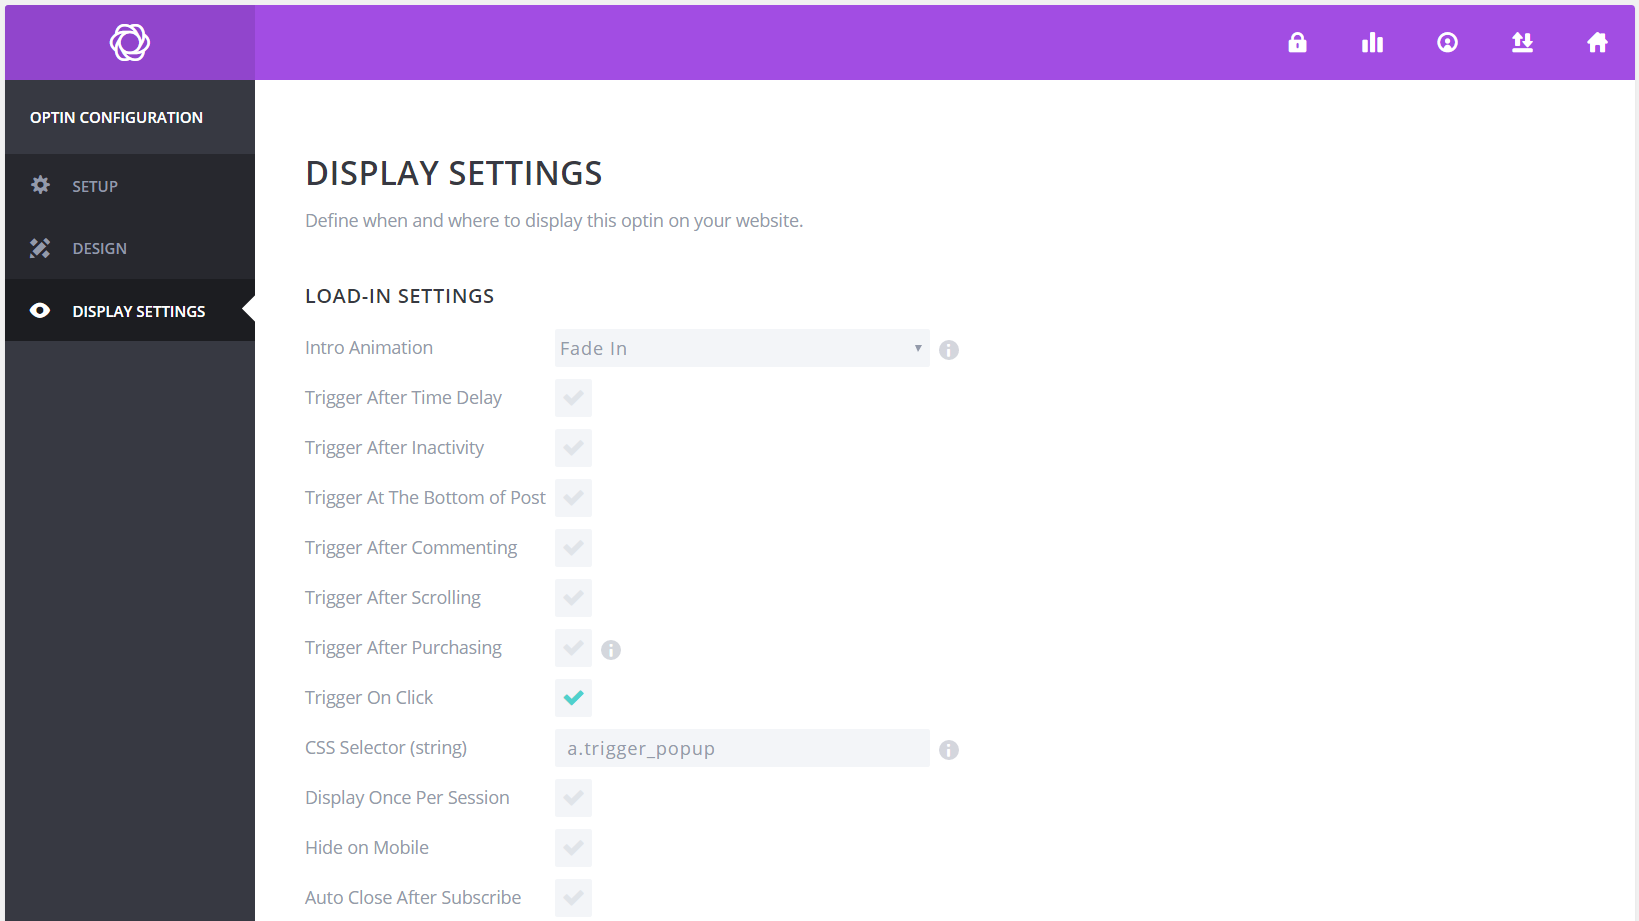
Now that we’ve finished creating our popup on click optin form using Bloom, we can attach it to a button or clickable image anywhere in our blog content.
Can you feel the excitement? We’re almost there!
Step 7
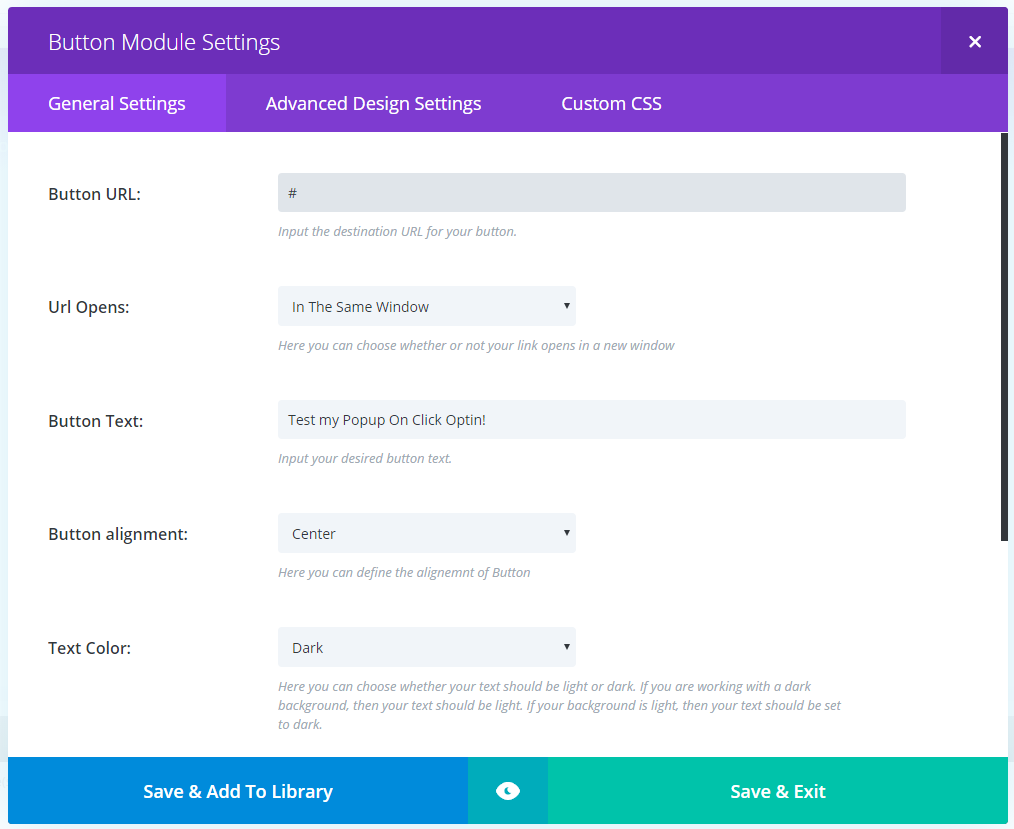
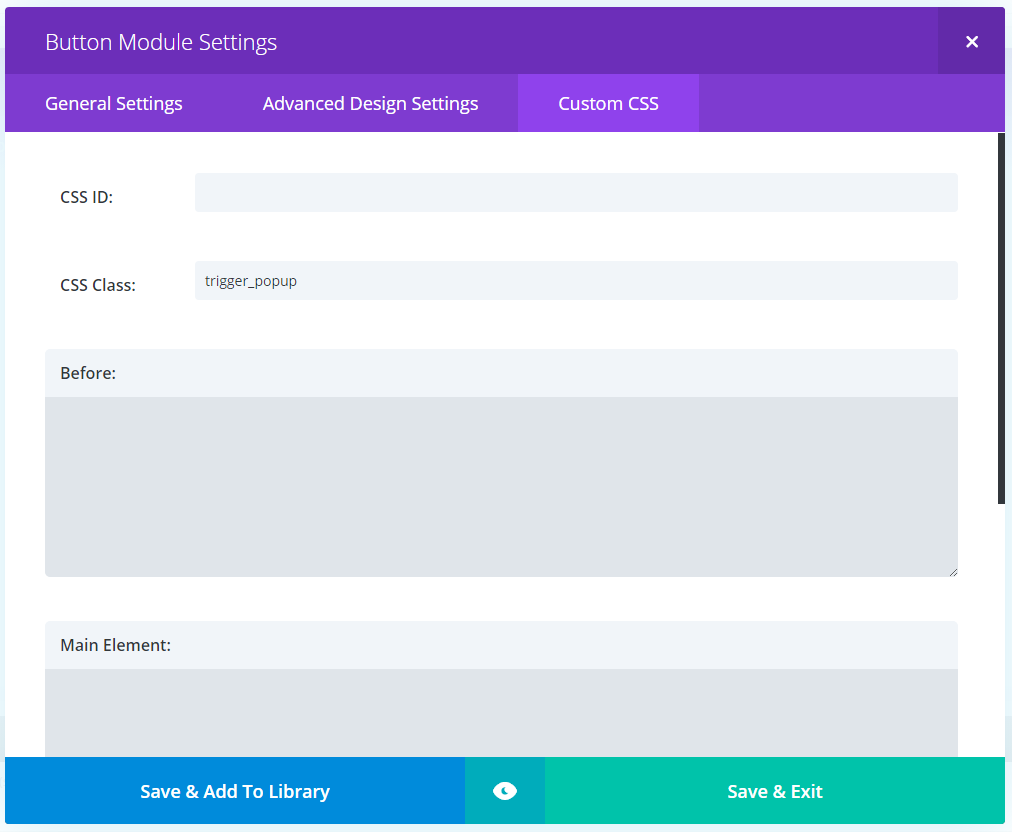
Add the clickable element to your blog design. Define the destination URL to be # and set the URL Opens destination to be “In the Same Window” – this will ensure your guest remains on the same webpage. Then go to the “Custom CSS” section and enter trigger_popup in the “CSS Class” section. Note that this must match what was entered in Step 6 above!
Finish defining your clickable element as normal.
Please Note:
If you aren’t using Divi as your WordPress theme, or if you would like to add this functionality manually to any element, here is the source code you’ll require:
<a class=”trigger_popup” href=”#”><img class=”” src=”Location-Of-Image.jpg” alt=”” height=”” width=””></a>
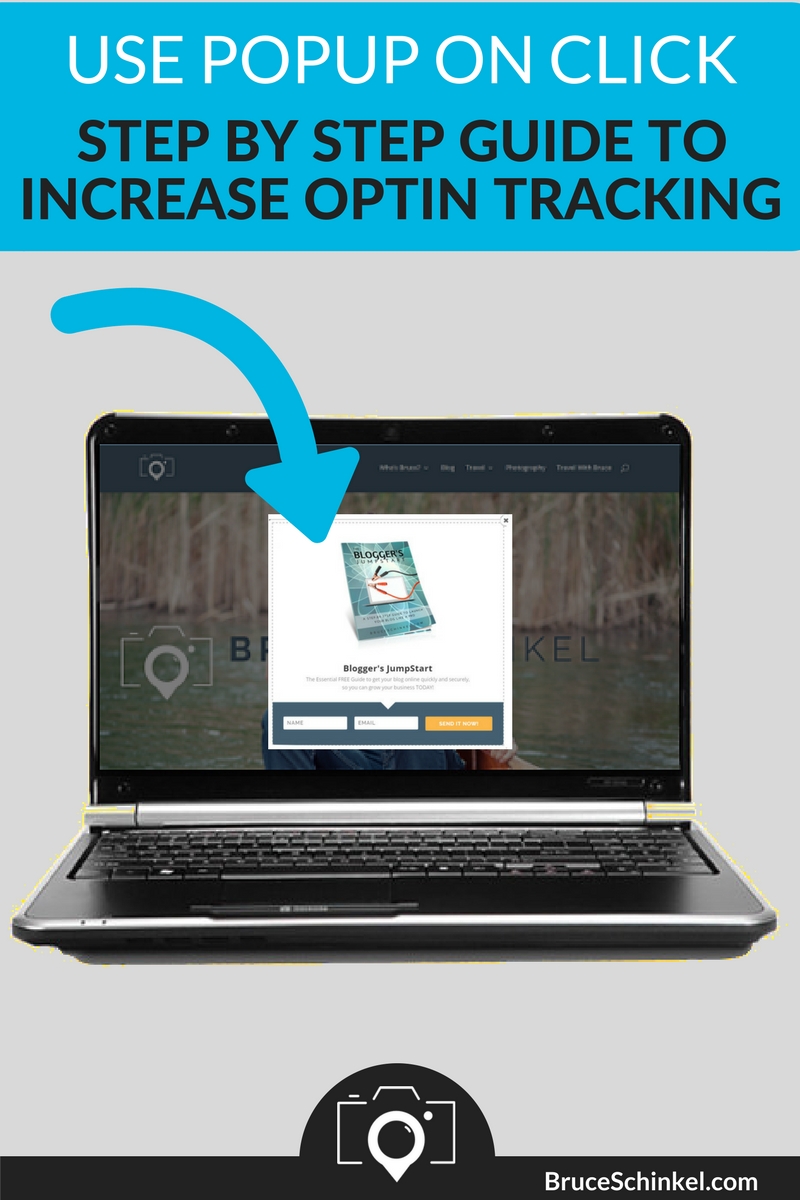
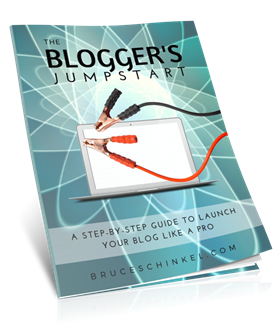
Here’s a sample of the finished product that I’ve used for my Blogger’s JumpStart Guide:
Was this helpful for you? If so, please share it with a friend who you think would get value!
Be sure to comment below and let me know how using a popup on click works for you!
P.S. If you’d LOVE to start Your Own Blog with “Just 3 Clicks”, check THIS out!
Was this valuable for you? If so I’d really appreciate your comments below and shares on social media.
Resources
Here is a list of the resources mentioned in this post:
Bloom – The ultimate email optin plugin for WordPress. Take complete control over the design and display of each optin form on your website.
Elegant Themes – A collection of 87 beautifully designed, highly customizable WordPress themes. I highly recommend using one of their Divi-based themes for ultimate control of your website.
AWeber – The industry standard in email autoresponders. Helps you grow your business and communicate with your customers and prospects through highly customizable email forms and templates.





WOW that was the best step by step lay out ever. I use this and will go back to make sure it is all set up as per your steps and example. Thank you.
Thanks so much Mike! Glad to help
Great list of resources to make the most of our online marketing…thank you for sharing.
Yes, definitely love those resources, Sherri!
I’m bookmarking this post. Very informative and easy to understand. Having pop-ups on your site is great way to increase your leads. Great training Bruce thanks for putting this together!
You’re very welcome, Dereco. Glad you got some value here
Wow! Thanks for sharing this step-by-step tutorial on setting up Bloom! That’s awesome Bruce!
You’ve very welcome Jelena; so glad you enjoyed!